

Mummy To Twins Plus One
Kids are always keen to make things and to do craft.
Wind Chimes are so easy to make and so much fun for the kids to create.
You can make one or two or more.
Each wind chime can be different for each child or you can just work on one big one, it is up to you.
This Wind Chime project is super easy to make. However, kids will need a little help to tie items and to hang the wind chime if it is in a high tree.
REMEMBER: Anything goes… it is the kids creation and if they want to put things in certain places, make things certain colours it is up to them.
The only thing that you need to ensure is that it makes noise in the wind.
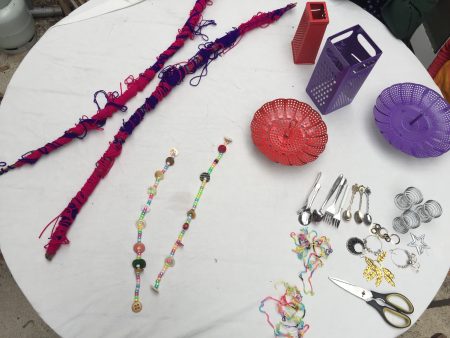
Items that I collected to make our wind chime
- Grater or Graters
- Metal strainer
- Spoons
- Forks
- Knifes
- Metal Egg Cups
- Beads
- Loom Bands (the kids can create this part of the decoration)
- Fishing line for tying things together and threading the beads
- We did drill a hole into the top of the spoon (It was easier to tie to the strainer and grater with the hole drilled – if you can find a spoon with a hole then grab them)
- Spray paint
- Wool – although I didn’t use it for this creation it will come in handy for the next one. We also decorated sticks to hang things off.
I went to various op shops to get my items for our wind chimes (We are going to make a few and have started with one). The wind chime is going straight outside, so I didn’t want to spend a fortune on the bits and pieces.
This project is perfect for anything you have lying around at home.
You can repurpose bottles, tins, and only buy a few things from the op shop to finish off your wind chime masterpiece.

The only things that I bought from shops were, wool and the spray paint. You can see how cheap
everything else was.
The kids had fun making their own wind chime. See how we created ours below.
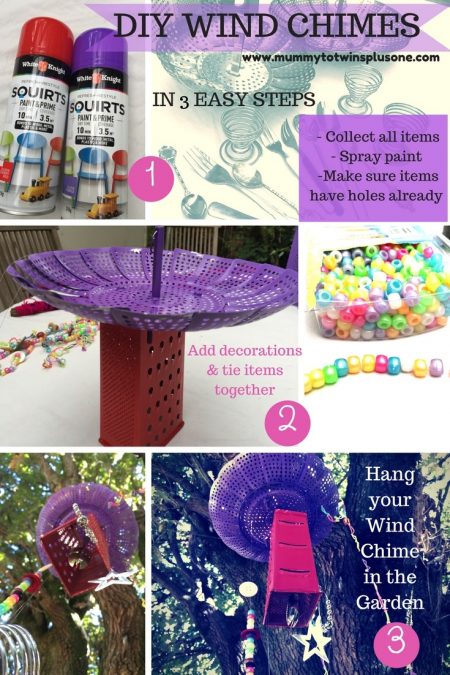
You can create your own wind chime in 3 steps:
Step 1.
Collect all your items that you will need for your wind chime.
Think about how it will be added together. Does it have holes already or will you need to drill a hole?
Most items I found had holes, and this made it easier to add all items together.
Spray paint any items you wish and then let dry.
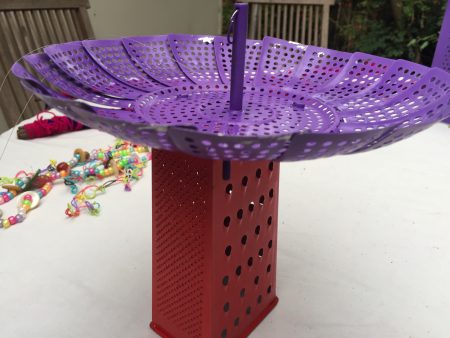
Step 2.
Now you have everything for your wind chime, think about how it will go together.
It is a good idea to put the items in different positions and then decide how it will hang when in the tree.
Once you have the plan of what piece goes where you can start attaching each part to the other.
This is the time that you can create your beaded decorations. These are simple to make, just tie a knot in the bottom of fishing line, add a button and then beads and more buttons. Finish the beads and buttons with a final button and then have more fishing line to allow to tie to the grater so it can hang.
Add the loom band decoration.
Add the earrings to the grater. (I purchased one off dangly earrings from an op shop. It was easy to clip on the side of the grater due to the holes)
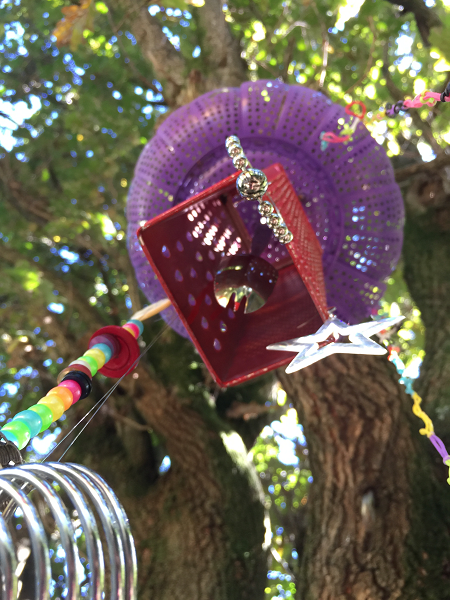
Step 3.
Once all done and is secured properly, pick a place to hang your new wind chime in the garden.
Now enjoy the new addition to the garden.
You may also like to read:


