Little Sprouts Program
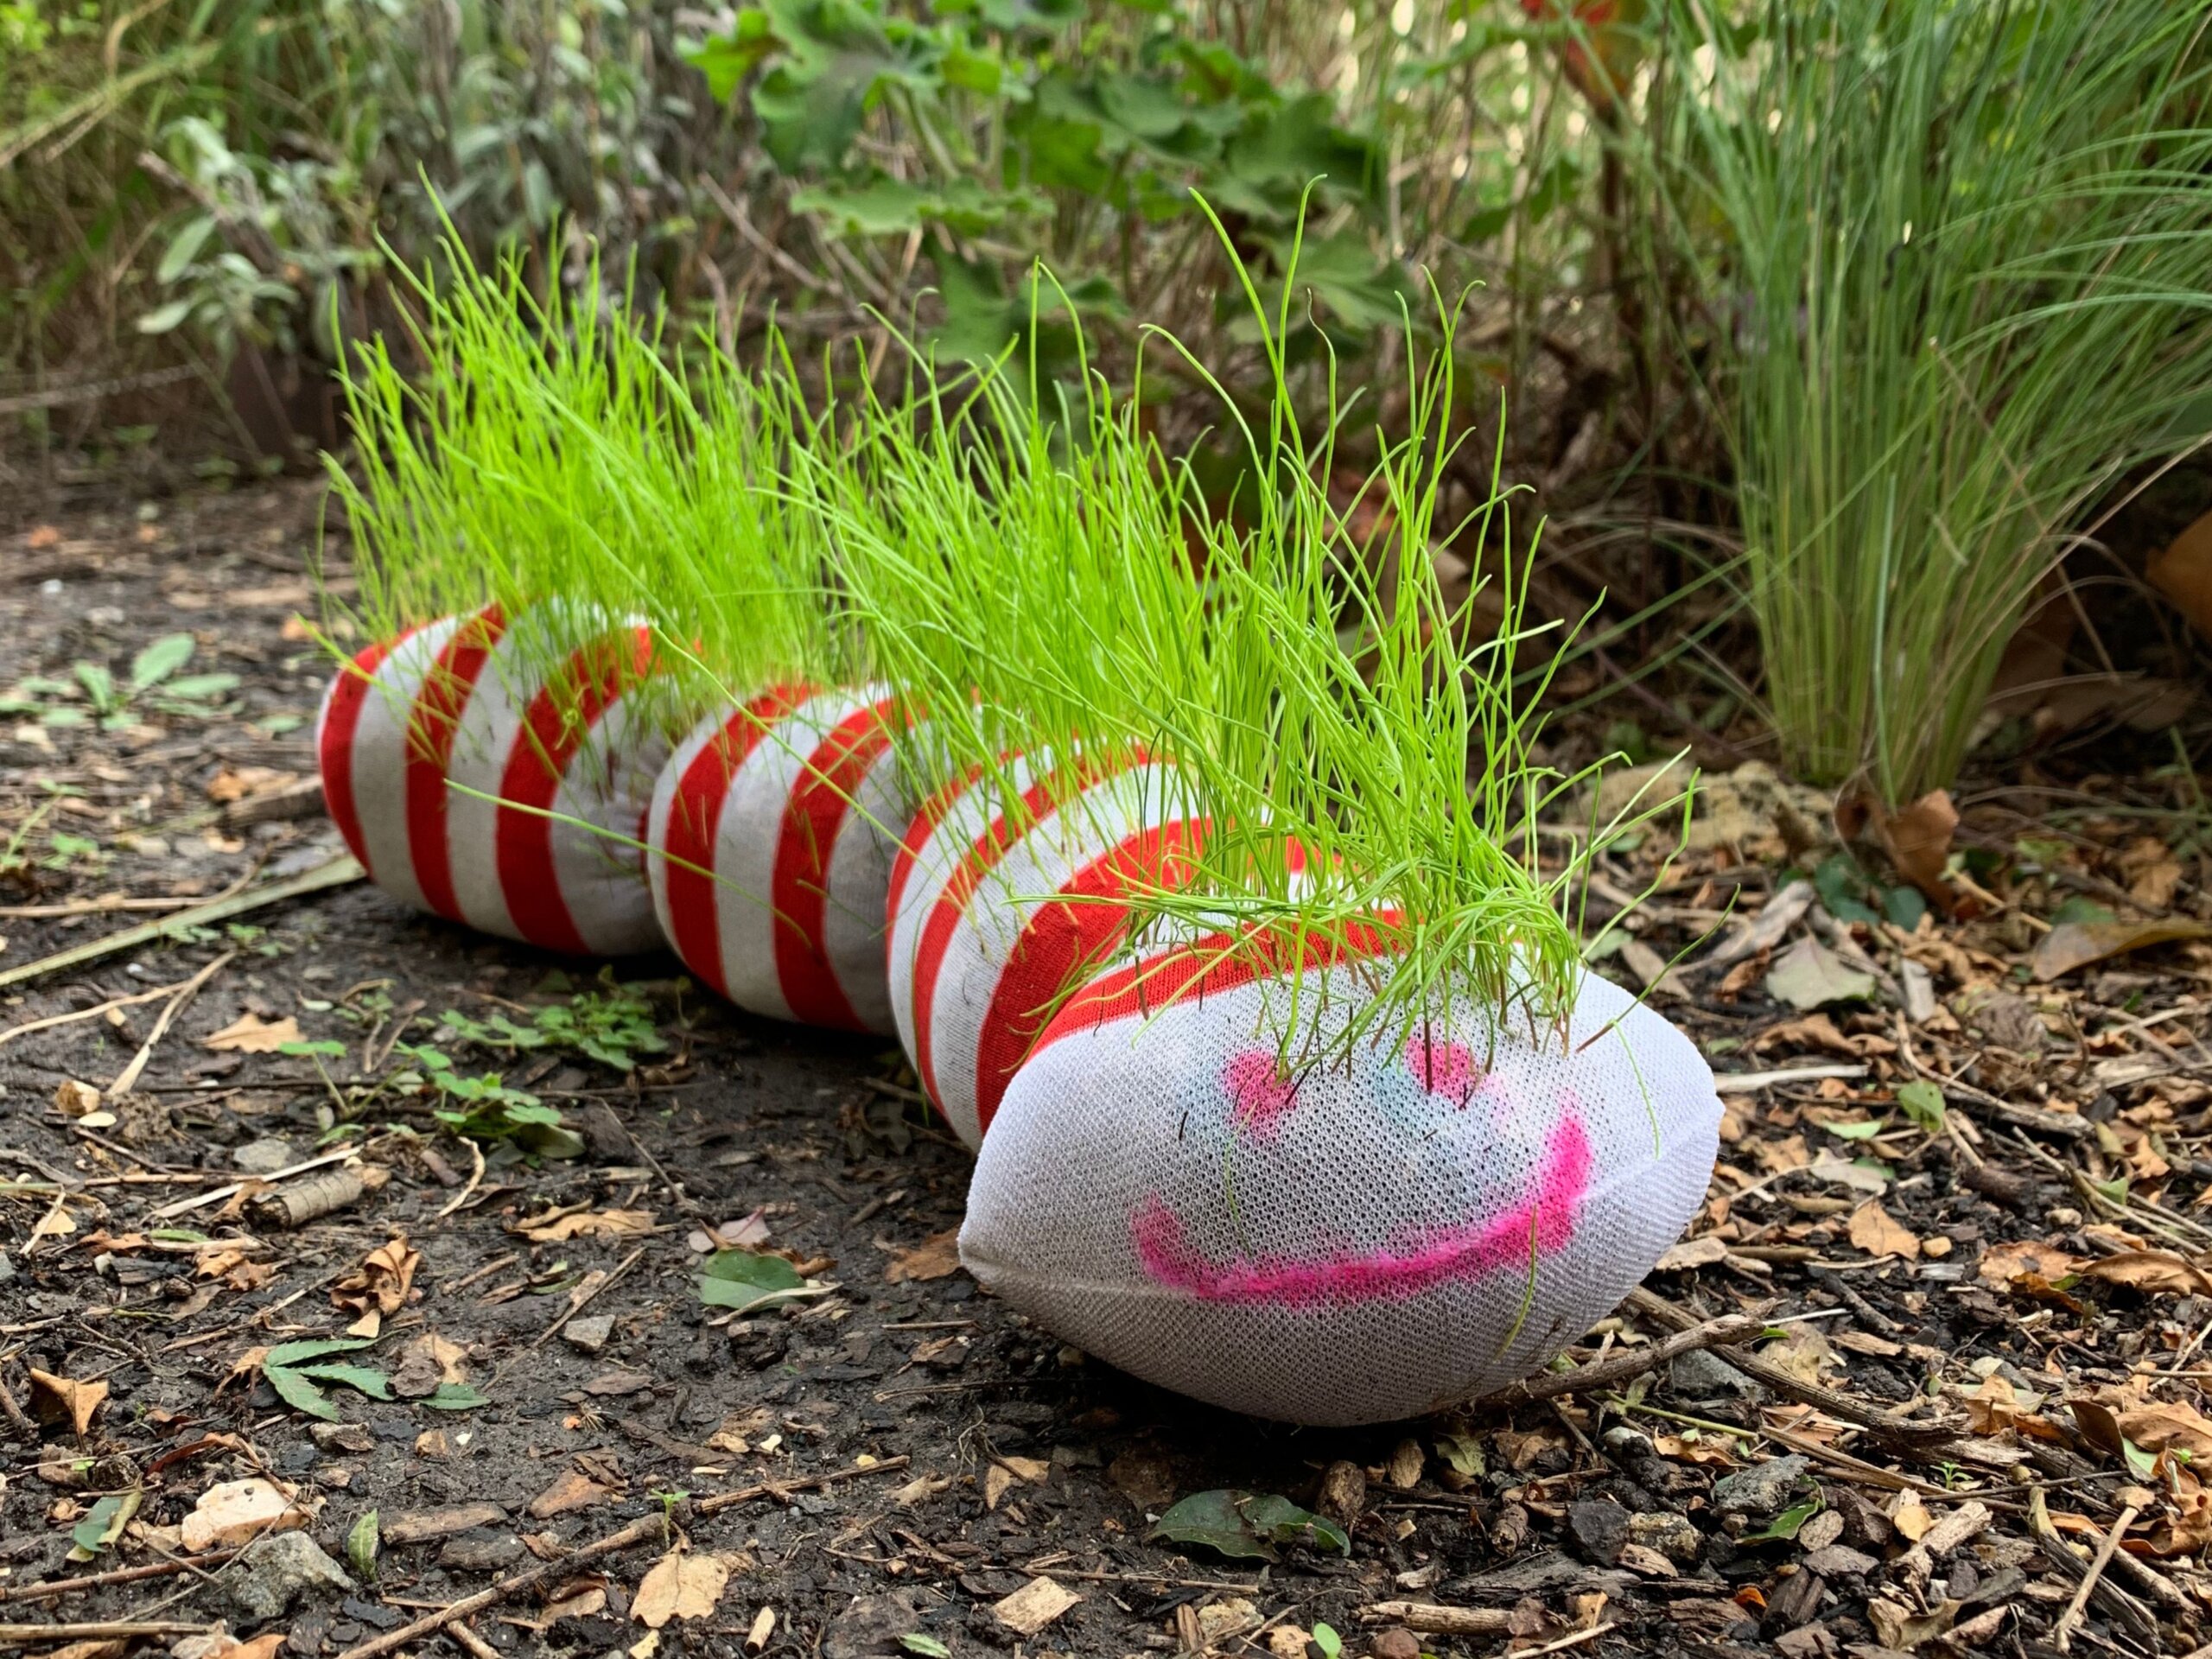
You’ve probably made grass heads before. But have you tried making a grass earthworm? This DIY early years activity combines scientific exploration with creativity (just like our sustainability incursions). It is suitable for children (3-5 years) to do with adult help.
This is a fun science experiment for kids to practice their fine motor skills; from spooning the seeds and soil into the stocking, to practicing trimming the growing grass. It teaches children about the growing cycle and how to care for plants. It also introduces children to the biology of earthworms.
Earthworms are amazing creatures! They eat our food waste and turn it into plant food. You can use this activity to explore the topic of earthworms and worm farming with children. Children can make their own segments on their worm and think about how earthworms move. Did you know earthworms also have hair-like bristles called setae used to grip and move? Kids can unleash their creativity in decorating the worm. This activity ensures guaranteed excitement as they watch the grass seeds germinate and grow through the stocking!
Materials required
Stockings
Find some old stockings, tights, pantyhose, or socks. If you don’t have any, you can usually find these at op shops. You can make at least 2 earthworms out of each leg of the stocking, depending on the desired length of your worm. Have one end open and one end closed – tie off one end if necessary.
*Tip: If you want to make sure you can compost your worm after you’re finished with it, you’re going to need do a bit of research about the material. Most pantyhose are made out of nylon which doesn’t biodegrade. There are lots of biodegradable pantyhose and socks out there if you don’t want to create any waste from this activity. Alternatively, you can clean and reuse the stockings after the activity e.g., for cleaning, gardening, or making hairy worms again!
Potting mix
For this activity we used Osmocote Seed & Cutting Premium Potting Mix from Bunnings, but any good quality potting mix or compost will do.
Spoon
A large spoon to add seeds and soil into the stocking.
Any seeds that grow quickly
You can get small boxes of lawn grass seeds from Bunnings or any nursery or hardware store. If you’re looking for options that kids can eat, try wheat grass, sprouting seeds or microgreens.
Twine or string
This is to tie your earthworm off into sections. We recommend natural twine or string that can biodegrade.
A funnel
We’ve used an old plastic cup with the bottom cut out. It’s very tricky for kids (and adults) to hold the stocking open and spoon in soil and seeds at the same time. The funnel will make it easier for kids to do the activity without 1:1 adult support. Look through your recycling bin to find something you can clean and reuse to make a funnel e.g., small plastic bottles or containers.
Decorations
Go wild! We decorated ours with used pipe cleaners and drew the face with a paint pen.
A container
To keep and catch the soil as you’re spooning it in.
Spray bottle
Optional (to keep the earthworm moist as the seeds germinate). You can also sprinkle water on your worm with a cup or your hands or do bottom watering, so the water is soaked up into the soil.
Steps to making a hairy earthworm
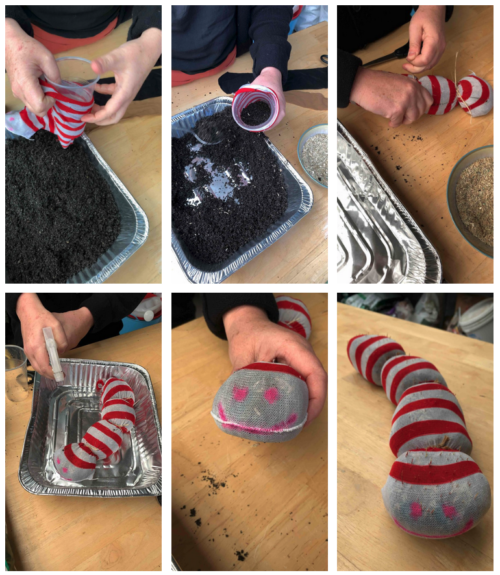
Step 1 – Set up
Insert the cup or funnel into the open end of the stocking and scrunch/pull the stocking up over the cup until it hits the closed end.
Step 2 – Add seeds and cover with soil
Pull the end out slightly so there is a bit of loose stocking. With the stocking laying horizontally, spoon your seeds into the open cup so they cover the bottom of the stocking. Spoon soil over the top of the grass seeds until the seeds are completely covered and the section is quite full. Lift the worm up to move the seeds and soil down. If you want to have seeds sprout at the top like ours, stick to adding the seeds in the same bottom position. If you lose track, you can usually see the seeds easily through the stocking to check. If this is too tricky, mix your seeds into your soil before you start and spoon it in altogether. The seeds will then sprout in all directions rather than just on top.
Step 3 – Continue filling up the stocking bit by bit
Continue pulling the closed end of the stocking gradually off the funnel in small sections. First add seeds to the bottom, then soil on top. Lift the worm up vertically every now and then so the seeds and soil keep filling up the worm (for a plump worm). Repeat this until the worm is filled to your liking. Remove the funnel when you get close to the end of the stocking. Leave room to tie off the open end of the worm with a knot.
Step 4 – Make your earthworm segments
Cut some pieces of string, twine, or old material. Tie these into worm sections. Tying a knot can be challenging for young kids. An easier way for kids 3-5 years old is to use old rubber bands so they can make the sections themselves.
Step 5 – Decorate
It’s time to decorate! Position your earthworm so it is lying with the seeds at the top and the soil at the bottom (if you combined the seeds and soil together beforehand, don’t worry about this step). Add a little face to your earthworm with whatever materials you can find.
Step 6 – Water and wait
Spray the top of your earthworm with water (where the seeds are). You could also gently pour some water over the top if you don’t have a spray bottle. Or if your earthworm is in a container, add some water to the bottom and the water will be soaked up. Remove leftover water in between watering. Keep your earthworm moist throughout the germination period and provide the right amount of light (for the seeds you are growing).
Step 7 – Watch it grow!
If you are using lawn grass seeds, you should see your seeds start to germinate around 5-7 days and then sprout during the week following.
A full video of the steps is available on the Little Sprouts Instagram @thelittlesproutsprogram.